Примеры возможности модуля Супер хук (часть 4)
![]()
Как и обещал, на этот раз покажу довольно простые примеры работы с модулем Супер хук. На этот раз мы добавим кнопку наверх сайта без использования картинки и установим скрипт расчета доставки для интернет магазина от http://russianpostcalc.ru/devel-just-to-index.php. Помимо статьи планирую записать наглядное видео для этих примеров.
Кнопка-стрелка наверх сайта
Подобных скриптов можно найти массу на просторах интернета, но мой вариант отличается отсутствием картинки и заменой ей иконкой awesome. Отрываем настройку нового блока в модуле и заполняем поля.
Селектор блока: body (это селектор типа всей страницы сайта )
Позиция по отношению к блоку: можете выбрать любой вариант, разницы нет так как положение кнопки будет определяться задаваемыми стилями.
Селектор модуля или HTML код :
|
1
|
<div id="scroller" style="display: none;"><span class="b-top-but"><i class="icon-eject icon-4x></i></span></div>
|
В блоке мы добавляем иконку-стрелку в тегах <code>< i ></code>
Изменяя класс-меняем нужную иконку выбирая из списка http://fortawesome.github.io/Font-Awesome/3.2.1/icons/
Далее добавляем стили для кнопки
|
1
2
3
4
5
6
7
|
<style>
.b-top {z-index:2600;position:fixed;left:0;bottom:90px;width:34%;margin-left:50%;opacity: 0.5;filter:alpha(opacity=50);}
.b-top:hover {opacity:1;filter:alpha(opacity=100);cursor:pointer;}
.b-top-but {z-index:2600;position:absolute;display:block;left:146px;bottom:0;margin:0 0 0 100%;padding:32px 12px 4px;
color: red;
}
</style>
|
Для изменения цвета копки замените color: red; на нужный вариант.
И добавляем скрипт .
|
1
2
3
4
|
<script type="text/javascript">$(document).ready(function(){
$(window).scroll(function () {if ($(this).scrollTop() > 0) {$('#scroller').fadeIn();} else {$('#scroller').fadeOut();}});
$('#scroller').click(function () {$('body,html').animate({scrollTop: 0}, 400); return false;});
});</script>
|
Сохраняем и ставим статус в положение да. Переходим на главную страницу сайта и прокручиваем страницу вниз и наблюдаем появление стрелки.
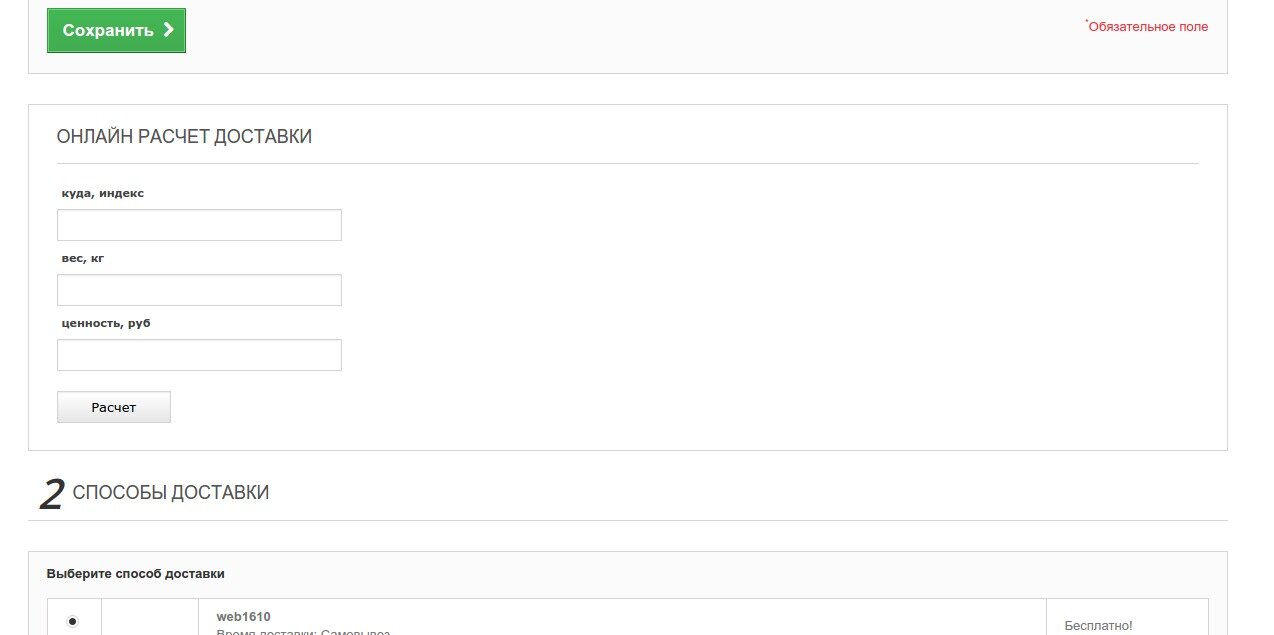
Калькулятор расчета стоимости и срока доставки
С помощью сервиса RussianPostCalc.ru установим калькулятор на странице оформления заказа. Весь нужный код вы увидите пройдя по ссылке указанной в начале статьи. Единственно я объясню как и куда нужно добавлять в настройках модуля. Открываем новый блок и заполняем следующие поля.
Блок с калькулятором я хочу разместить между блоками нового клиента и способы доставки на странице оформления заказа с установленной формой в один шаг. Для этого определим уникальный селектор блока нового клиента он будет #opc_new_account заносим его в селектор блока.
Добавляем HTML содержимое и в поле
|
1
2
3
4
|
<div id="rpc_init" class="opc-main-block"> </div>
<div id="rpc_default_from_index" style="display: none !important;">690000</div>
<p><a id="rpc_href" href="http://russianpostcalc.ru/">Калькулятор почтовых отправлений</a></p>
<script src="http://js.russianpostcalc.ru/v1.js"></script>
|
Во второй строчке нужно указать ваш индекс( я указал 690000 код Владивостока)
Добавляем стили .
CSS для контента:
|
1
2
3
4
5
6
7
8
9
10
11
12
13
14
15
16
17
18
19
20
21
22
23
24
25
26
27
28
29
30
31
32
33
34
35
36
37
38
39
40
41
42
43
44
45
46
47
48
49
50
51
52
53
54
55
56
57
58
59
60
61
62
63
64
65
66
67
68
69
70
71
72
73
74
75
76
77
78
79
80
81
82
83
84
85
86
87
88
89
90
91
92
93
94
95
96
97
98
99
100
101
102
103
104
105
106
107
108
109
110
111
112
113
114
115
116
117
118
119
120
121
122
123
124
125
126
127
128
129
130
131
132
133
134
135
136
|
<link href="http://js.russianpostcalc.ru/css/autocomplete.css" rel="stylesheet" type="text/css" />
<link href="http://js.russianpostcalc.ru/css/rpc_add.css" rel="stylesheet" type="text/css" />
<style>
#3333{
width: 280px;
margin-bottom: 15px;
}
#rpc_init { padding: 5px 10px; margin: 0px; font-family: Verdana, Geneva, sans-serif; }
#rpc_href {font-size: 10px;}
#rpc_error_wrap {}
#rpc_error {font-weight: bold; color: #222; padding-bottom: 10px;}
#rpc_error_msg {padding-top: 5px; color: #555; font-size: 0.95em;}
#rpc_error_button {margin-top: 10px;}
#rpc_success_wrap {}
#rpc_result {}
#rpc_result_title{font-family: "Open Sans", sans-serif;
font-weight: 600;
text-transform: uppercase;
color: #555454;
font-size: 18px;
padding: 0 0 15px;
line-height: normal;
margin-bottom: 12px;
border-bottom: 1px solid #d6d4d4;}
#rpc_result_from_city {}
#rpc_result_from_index {}
#rpc_result_to_city {}
#rpc_result_to_index {}
#rpo_result_default {padding-top: 5px; color: #555; font-size: 0.95em;}
#rpc_result_default_sum {font-weight: bold; color: #333;}
#rpc_result_default_days {font-weight: bold; color: #333;}
#rpo_result_class1 {padding-top: 5px; color: #555; font-size: 0.95em;}
#rpc_result_class1_sum {font-weight: bold; color: #333;}
#rpc_result_class1_days{font-weight: bold; color: #333;}
#rpc_result_button {margin-top: 10px;}
#rpc_request {}
#rpc_request input {
width: 25%;
height: 32px;
padding: 6px 12px;
font-size: 13px;
line-height: 1.42857;
vertical-align: middle;
background-color: #fff;
border: 1px solid #d6d4d4;
border-radius: 0px;
-webkit-box-shadow: inset 0 1px 1px rgba(0, 0, 0, 0.075);
box-shadow: inset 0 1px 1px rgba(0, 0, 0, 0.075);
-webkit-transition: border-color ease-in-out 0.15s, box-shadow ease-in-out 0.15s;
transition: border-color ease-in-out 0.15s, box-shadow ease-in-out 0.15s;}
#rpc_request label {color: #444; font-size: 0.85em; padding: 5px; margin: 0px; display: flex; }
#rpc_request ul {padding: 0px 0px; margin: 0px; list-style: none;}
#rpc_request ul li {padding: 0px 0px; margin: 0px; list-style: none;}
#rpc_request_title {font-family: "Open Sans", sans-serif;
font-weight: 600;
text-transform: uppercase;
color: #555454;
font-size: 18px;
padding: 0 0 15px;
line-height: normal;
margin-bottom: 12px;
border-bottom: 1px solid #d6d4d4;}
#from_country {}
#to_country {}
#rpc_label_from_city { }
#rpc_label_from_index {}
#rpc_label_from_state {}
#rpc_label_to_city {}
#rpc_label_to_index {}
#rpc_label_to_state {}
#rpc_label_weight {}
#rpc_label_cennost {}
#rpc_ul_city {display: none;}
#from_city {}
#to_city {}
#rpc_ul_index {}
#from_index {}
#to_index {}
#rpc_ul_state {display: none;}
#from_state {}
#to_state{}
#rpc_ul_weight{}
#weight {}
#rpc_ul_cennost {}
#ob_cennost_rub {}
#rpc_submitbox {}
#rpc_submit {
margin-top: 20px;
display: inline-block;
padding: 4px 12px;
margin-bottom: 0;
font-size: 14px;
line-height: 20px;
text-align: center;
vertical-align: middle;
cursor: pointer;
color: #000;
text-shadow: 0 1px 1px rgba(255, 255, 255, 0.75);
background-color: #f5f5f5;
background-image: -moz-linear-gradient(top, #ffffff, #e6e6e6);
background-image: -webkit-gradient(linear, 0 0, 0 100%, from(#ffffff), to(#e6e6e6));
background-image: -webkit-linear-gradient(top, #ffffff, #e6e6e6);
background-image: -o-linear-gradient(top, #ffffff, #e6e6e6);
background-image: linear-gradient(to bottom, #ffffff, #e6e6e6);
background-repeat: repeat-x;
filter: progid:DXImageTransform.Microsoft.gradient(startColorstr='#ffffffff', endColorstr='#ffe6e6e6', GradientType=0);
border-color: #e6e6e6 #e6e6e6 #bfbfbf;
border-color: rgba(0, 0, 0, 0.1) rgba(0, 0, 0, 0.1) rgba(0, 0, 0, 0.25);
filter: progid:DXImageTransform.Microsoft.gradient(enabled = false);
border: 1px solid #cccccc;
border-bottom-color: #b3b3b3;
-webkit-border-radius: 4px;
-moz-border-radius: 4px;
border-radius: 4px;
-webkit-box-shadow: inset 0 1px 0 rgba(255,255,255,.2), 0 1px 2px rgba(0,0,0,.05);
-moz-box-shadow: inset 0 1px 0 rgba(255,255,255,.2), 0 1px 2px rgba(0,0,0,.05);
box-shadow: inset 0 1px 0 rgba(255,255,255,.2), 0 1px 2px rgba(0,0,0,.05);
width: 10% !important;
}
#rpc_ul_index > li:nth-child(1){display:none;}
#posta{background: #fbfbfb;
border: 1px solid #d6d4d4;
padding: 14px 18px 13px;
margin: 0 0 30px 0;
line-height: 23px;}
#rpc_href{display:none;}
</style>
|
В данном варианте я не подгружал стили из файла rpc_style.css , а скопировал его код и поправил под стили нашего шаблона PrestaShop , что и рекомендуется на сервисе.
Сохраняем и ставим статус да.
Резюме
Возможности модуля Супер хук огромные, это не только перемещение существующих блоков сайта, но и добавление своего контента. Для этого можно использовать виджеты разнообразных сервисов , находить и устанавливать интересные плагины помогающие не только украсить ваш магазин, но и добавить его функционал. Можно отказаться от многих модулей и и использовать всего один Супер модуль. Удачи в бизнесе и до встречи на страницах webnewbie.ru
Related Posts
-
 Использование блока «Поделиться» от Yandex
-
 Кнопка загрузить еще для модуля PrestaShop 1.5, 1.6
-
 Случайные товары на главной странице ПрестаШоп.
-
 Как добавить уведомление по email для модуля комментариев.
-
 Расширение функционала HTML-редактора для PrestaShop 1.5.x
-
 Экспорт товаров PrestaShop не используя модули
Leave a Reply